

Electronic Reporting tips and tricks (part 1)
But real practice tells a different story: effective work with ER requires a deep understanding of concepts, data structures, formats, models, and numerous subtle details. The universality of the technology hides its complexity, and confident mastery comes only with experience.
Our specialists have been working with ER for many years, encountering all kinds of scenarios and limitations, and today they share practical tips and tricks that will help beginning ER professionals master the tool faster and avoid common pitfalls - some of these insights may save you hours of investigation or even enable you to accomplish what once seemed impossible.
Excel templates settings:
1. Excel report headers on first page only
Have you ever run into a situation where your Excel report headers appear only on the first page, and the “Rows to repeat at top” setting under Page Layout -> Print Titles seems to do nothing?
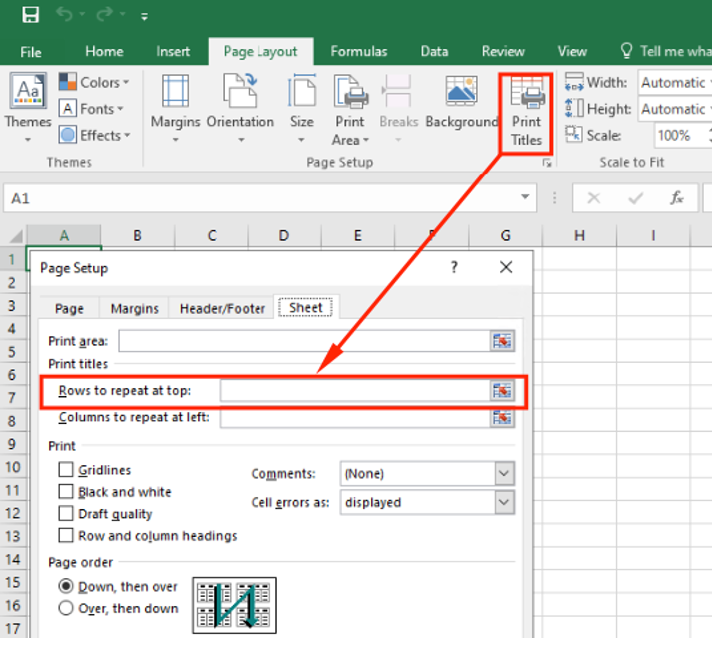
ER Excel template sheet names should not have spaces in the name. If a sheet name contains spaces, the “Rows to repeat at top” parameter is ignored, and your headers will print only on the first page.
I.e. use name “PickinsListWorksheet”, not “Picking List Worksheet”:

Otherwise, “Rows to repeat at top” parameter under “Print titles” button will do nothing (specified rows will be printed only at first page).
2. Different First Page must be off from start
When designing headers for a ER Excel report, make sure the “Different First Page” checkbox is set to “No” from the very beginning. This detail is easy to overlook, but it has a critical impact on page printing logic: if the checkbox was enabled during the initial setup, Excel will start printing page numbers in the header only on odd-numbered pages.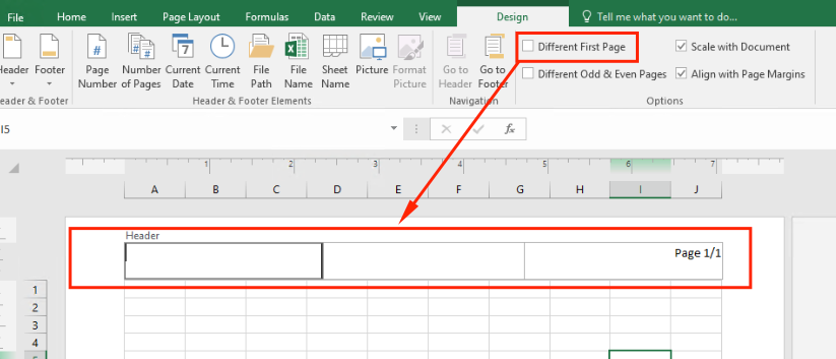
What’s worse, disabling the option later will not fix the behavior. Once the template is created with “Different First Page” turned on, the issue persists, and fixing the report afterward becomes labor-intensive.
Keeping this parameter off right from the start ensures that page numbers and other header data appear correctly throughout the entire report.
3. Dates and “Wrap text” can change row height
When working with dates in ER Excel templates, be careful with the “Wrap text” property. Even if the column is wide enough to fit the date on a single line, enabling text wrapping may cause Excel to automatically increase the row height - sometimes doubling it without any visible reason.
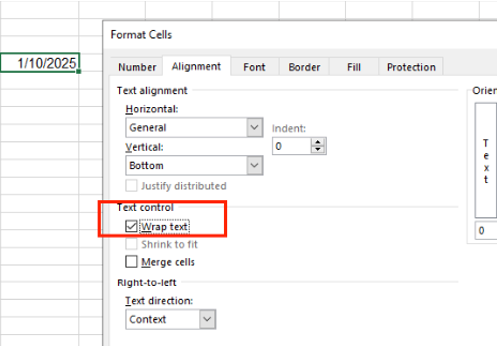
Leaving “Wrap text” disabled for date cells helps prevent unexpected layout changes and keeps the report looking clean and consistent. However, the feature “Wrap text” itself is very useful on projects - just avoid using it for cells containing dates.
4. Hidden borders appear in PDF export
Sometimes an Excel template you receive contains a hidden row border that looks nearly invisible in the spreadsheet itself. However, once the report is exported to PDF, this barely noticeable line suddenly becomes clearly visible.
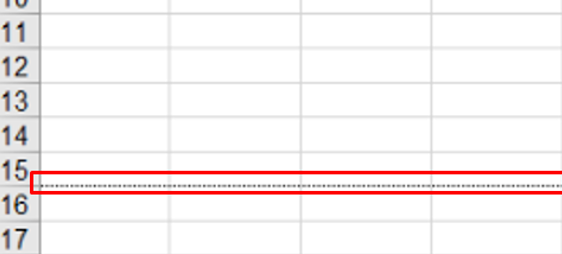
If you encounter unexpected borders in the final output, it’s worth checking the template carefully - Excel may be hiding formatting that only reveals itself during PDF rendering.
Configuration options:
5. “Run draft” may break execution for other users
Enabling the “Run draft” option in a ER format may seem harmless, but it comes with a hidden side effect: when this checkbox is turned on, the report can suddenly stop executing for every other user, without producing any error message or warning.
Organization administration -> Electronic reporting -> Configurations:

Because of this behavior, it’s strongly recommended to avoid using “Run draft” in any environment other than development. Keeping it disabled ensures that the format runs reliably for all users and prevents silent failures that are otherwise extremely hard to diagnose.
6. Copy labels between formats via XML
Working with labels across multiple ER formats can be much simpler than it seems. You can easily copy labels from one format to another.
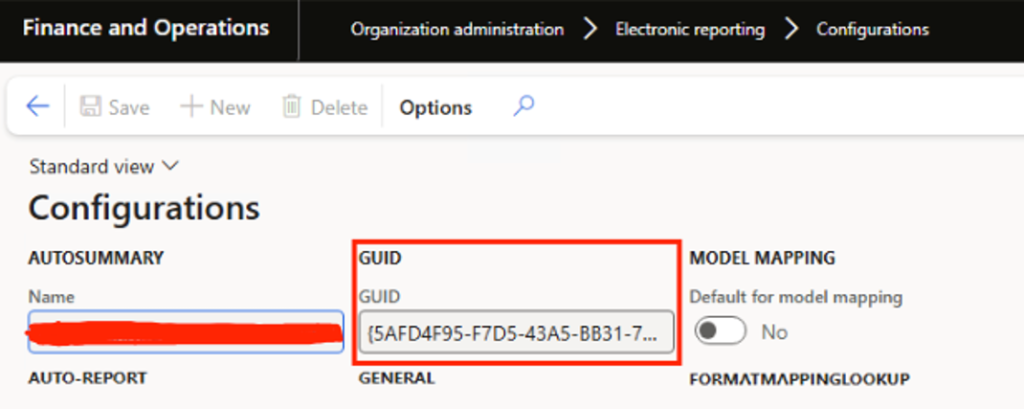
If you need to reuse an existing set of labels, you can export them from the source format as an XML file, open it, and replace the GUID in the third-line tag with the GUID of the target format.

To find the correct GUID, just open Record info for the destination configuration and enable Show all fields - the identifier will be listed there.
After updating the XML, import it into the new format, and all labels will immediately become available for use.

Keep up to date with new articles before anyone else, subscribe to our mailing list
Table of Contents


Thank you for the request!
We will get back to you soon.